That's certainly on the bucket list OlivierOlivier Carneau wrote:Waiting for a good weather to taste wine, you need to visit FranceAdam Durrant wrote:No chance to do any modelling today, weather was good so went wine tasting instead!
M109A6 Paladin
-
Adam Durrant
- Senior Site Contributor.....

- Posts: 1791
- Joined: 22 Apr 2016, 05:41
- Location: Auckland, NZ
Re: M109A6 Paladin
I'm a serial kit starter....
Completed Campaigns:


Completed Campaigns:
-
Adam Durrant
- Senior Site Contributor.....
- Posts: 1791
- Joined: 22 Apr 2016, 05:41
- Location: Auckland, NZ
Re: M109A6 Paladin
Got some building done over the last day or so. I'm going a bit "Gary" on this one, apart from the main gun everything else is going to see a lots of PE. The Voyager set is a joy to work with so far, the parts are easy to work with and the PE frets come in several thicknesses of brass depending on the part being modelled. Also has a ton of extra clasps, weld seams etc. to go in the spares box at the end.
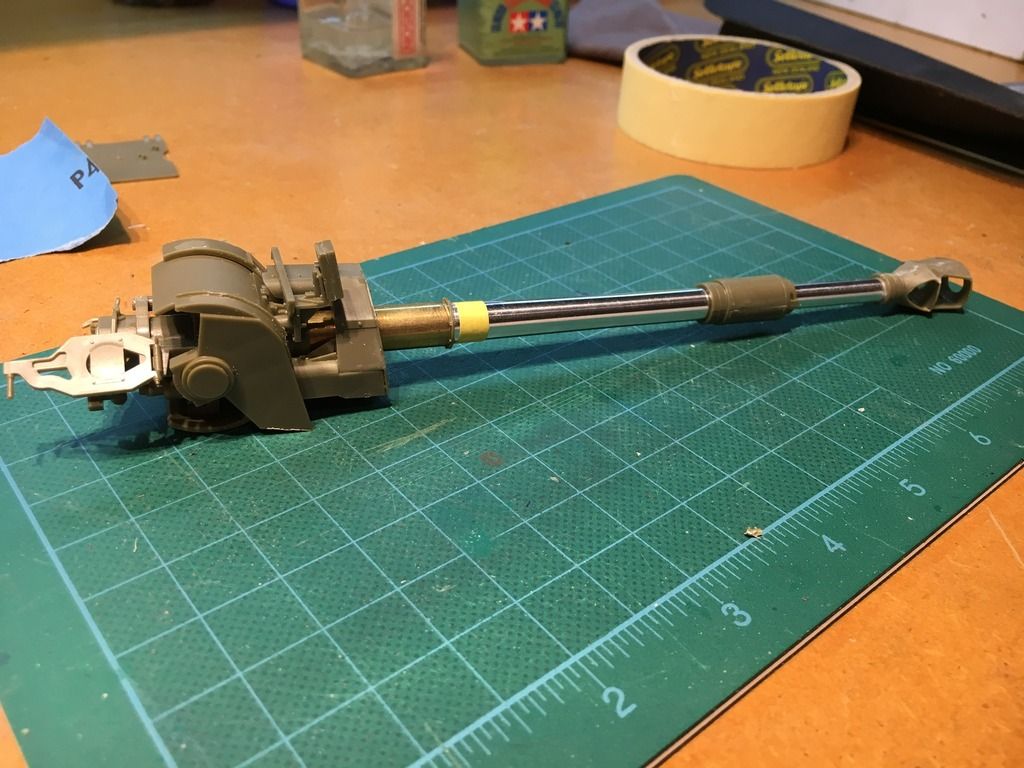
Main gun is all done, just a seam in the muzzle brake to fill, some wiring to the radar panel and a weld to model on the recoil tube. Main gun is made up of as many pieces as some models
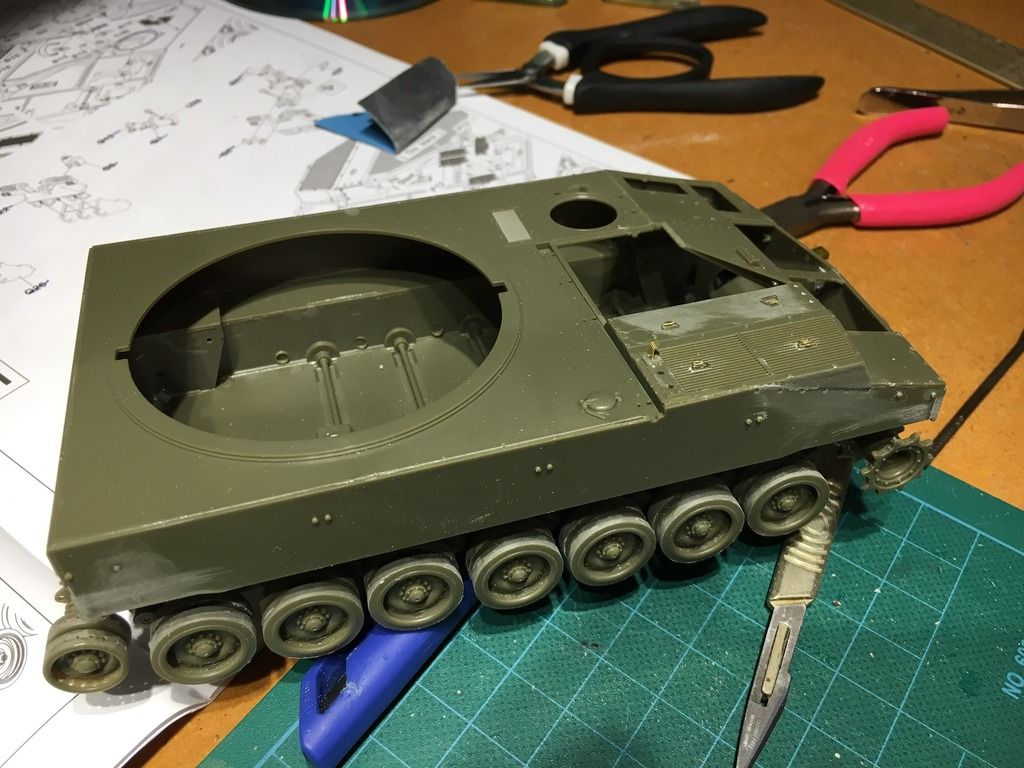
Running gear is all done, the road wheels were a pain, 4 parts to each wheel with a lot of sanding to make them look the part. The idler needed lightening holes drilled in the circumference as well, this took some time and planning! The Hull tub was made up of 9 flat panels, despite that it comes together pretty square with only one little area of sanding to fit. I've done all the PE on the lower hull, pics to follow but basically the whole rear of the vehicle was sanded flat and replaced! Pics to follow when I finish the PE mud guards and springs.
Tracks are all done, they were a fiddle to assemble but one I was in a good rhythm they went together pretty quickly. They are fully workable, all thats left to do is distress the rubber track pads where they will be visible.
Should have the lower hull all finished by this weekend, all going well. The turret is where is going to take some time however as there is a ton of detail to add.
Also finally found some figures I like and they are in the post
Main gun is all done, just a seam in the muzzle brake to fill, some wiring to the radar panel and a weld to model on the recoil tube. Main gun is made up of as many pieces as some models
Running gear is all done, the road wheels were a pain, 4 parts to each wheel with a lot of sanding to make them look the part. The idler needed lightening holes drilled in the circumference as well, this took some time and planning! The Hull tub was made up of 9 flat panels, despite that it comes together pretty square with only one little area of sanding to fit. I've done all the PE on the lower hull, pics to follow but basically the whole rear of the vehicle was sanded flat and replaced! Pics to follow when I finish the PE mud guards and springs.
Tracks are all done, they were a fiddle to assemble but one I was in a good rhythm they went together pretty quickly. They are fully workable, all thats left to do is distress the rubber track pads where they will be visible.
Should have the lower hull all finished by this weekend, all going well. The turret is where is going to take some time however as there is a ton of detail to add.
Also finally found some figures I like and they are in the post
I'm a serial kit starter....
Completed Campaigns:
Completed Campaigns:
-
Philipp Gross

- Site Admin/Founder
- Posts: 5122
- Joined: 19 Jul 2014, 23:40
- Location: Frankfurt
- Contact:
Re: M109A6 Paladin
Looking good 
Nice work on the idler, getting all the holes properly lined up must have been a pain.
Philipp
Nice work on the idler, getting all the holes properly lined up must have been a pain.
Philipp
Completed Campaigns:


-
Olivier Carneau

- Senior Site Contributor.....
- Posts: 1178
- Joined: 24 Jul 2014, 09:40
- Location: Corrèze, Southern France
- Contact:
Re: M109A6 Paladin
Good job so far. The gun is impressive indeed.
I have the old Italeri one and I think I won't bother drilling the idler holes. But as you build the newer AFV gun, I understand you couldn't let these details missing. AFV could have designed the idler in multiple parts to create the holes.
I have the old Italeri one and I think I won't bother drilling the idler holes. But as you build the newer AFV gun, I understand you couldn't let these details missing. AFV could have designed the idler in multiple parts to create the holes.
-
Shawn Ramsey

- Senior Site Contributor.....
- Posts: 1987
- Joined: 20 Jul 2014, 00:26
Re: M109A6 Paladin
Nice start Adam. You have quite the collection of accessory's for this one.
Shawn
Shawn
Completed Campaigns:


-
Vincent Power

- Senior Site Contributor.....
- Posts: 2641
- Joined: 31 Jul 2014, 23:49
- Location: Melbourne Australia
-
Steve Hutchinson

- Senior Site Contributor.....
- Posts: 2263
- Joined: 20 Jul 2014, 08:27
- Location: Bradford West Yorkshire, UK
Re: M109A6 Paladin
Morning Adam
Both Gary by brass and pace of build too
Not forgetting an eye for detail
Great progress
Steve H
Both Gary by brass and pace of build too
Not forgetting an eye for detail
Great progress
Steve H
""I need to be creative, to feel ALIVE!""
Completed Campaigns:
Completed Campaigns:
-
Adam Durrant
- Senior Site Contributor.....
- Posts: 1791
- Joined: 22 Apr 2016, 05:41
- Location: Auckland, NZ
Re: M109A6 Paladin
Thanks guys. The idler was in two halves and there were some half assed attempts to replicate the holes with divots but they were too few looking at the reference photos. I filled with superglue, sanded them and they randomly selected a micro drill about the right size. Holes were spaced by constantly halving the space between them to get then even.
Working on the rear mudguards presently, 9 small parts per guard so a bit of a fiddle!
Thinking of starting my 38t build simultaneously as that one is going to be OOB. This will keep me sane! Just waiting for it to turn up in the post.
Working on the rear mudguards presently, 9 small parts per guard so a bit of a fiddle!
Thinking of starting my 38t build simultaneously as that one is going to be OOB. This will keep me sane! Just waiting for it to turn up in the post.
I'm a serial kit starter....
Completed Campaigns:
Completed Campaigns:
-
Adam Durrant
- Senior Site Contributor.....
- Posts: 1791
- Joined: 22 Apr 2016, 05:41
- Location: Auckland, NZ
Re: M109A6 Paladin
Got a bit more done over the last couple of evenings. The lower hull is finished, the clear stickers on the nose are AFV Clubs attempt to replicate the antislip coating. According to Gary, who has built this kit, it looks pretty good once painted. Pity, I had already purchased a big packet of chinchilla dust!
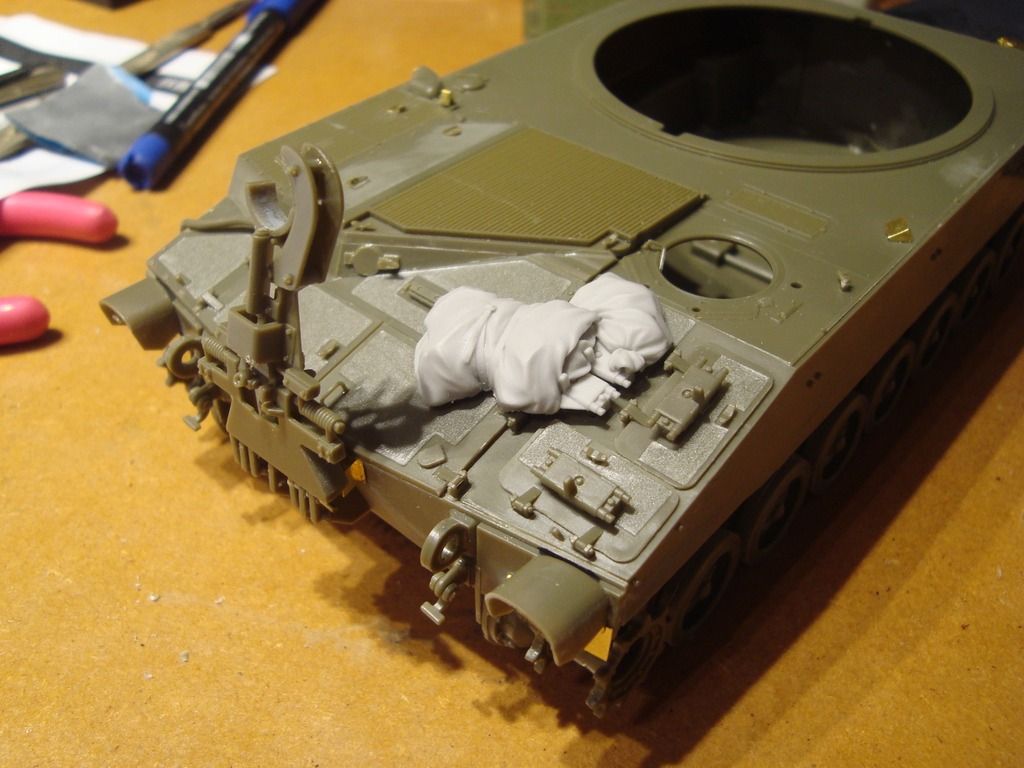
The first bit of stowage is secured. I had to rebuild the articulations of the travel lock as they were pretty basic. The lockers on the rear hull are from the Voyager set. I won't be doing the same on the turret as the AFV ones are detailed enough. The wee locks either side of the rear door are fully workable as are the spades which I will eventually stow as the vehicle won't be in action in the diorama I have planned. It appears from the research I've done they only deploy the spades when firing max charge anyway.
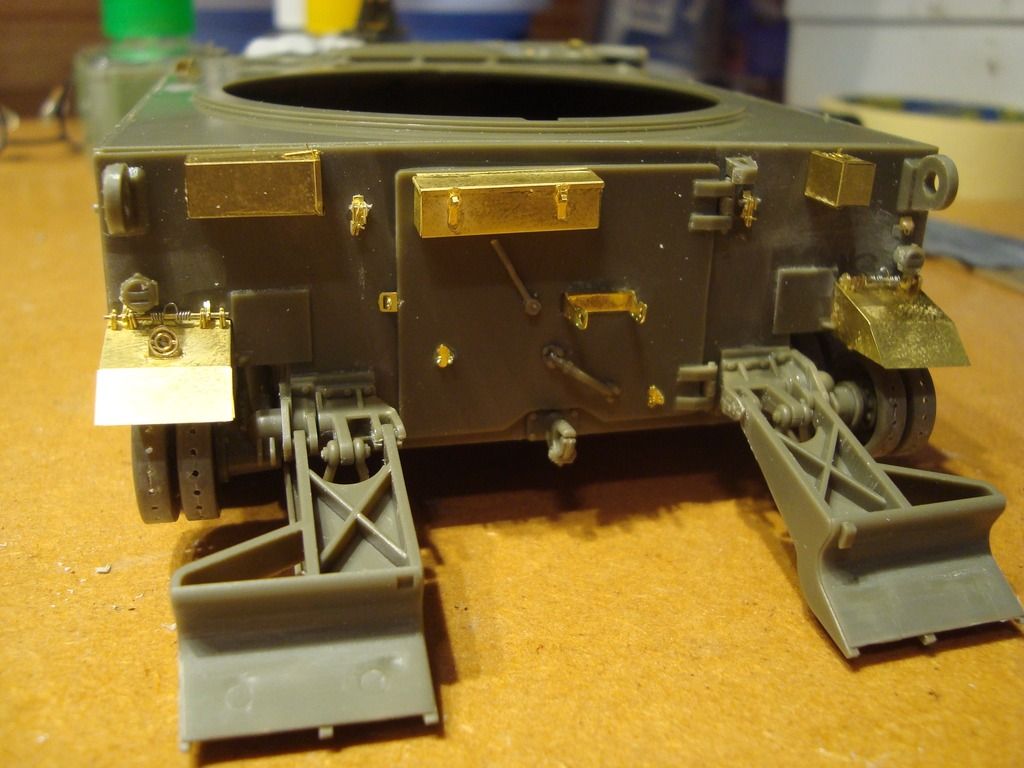
The mud guards were a fiddle, but again are fully articulated, though I've glued them in the down position. The wee spring is made from fuse wire. I'm getting better with PE and am definitely less scared of it now
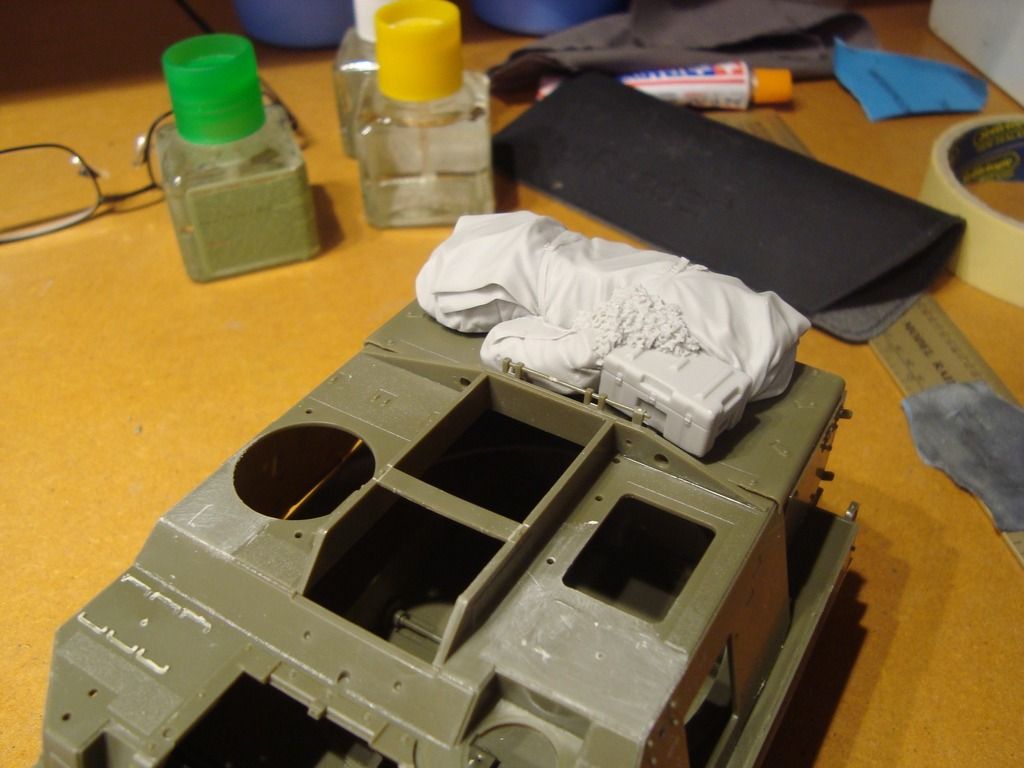
This is the start of the turret, the whole vehicle looks bare without a ton of stowage, I've just placed the main stowage piece from Legend to get a feel for it. This is about half of what I have planned.
Final pic is the base of the turret with the cannon installed and in the travel lock. This is how I plan to have it positioned.
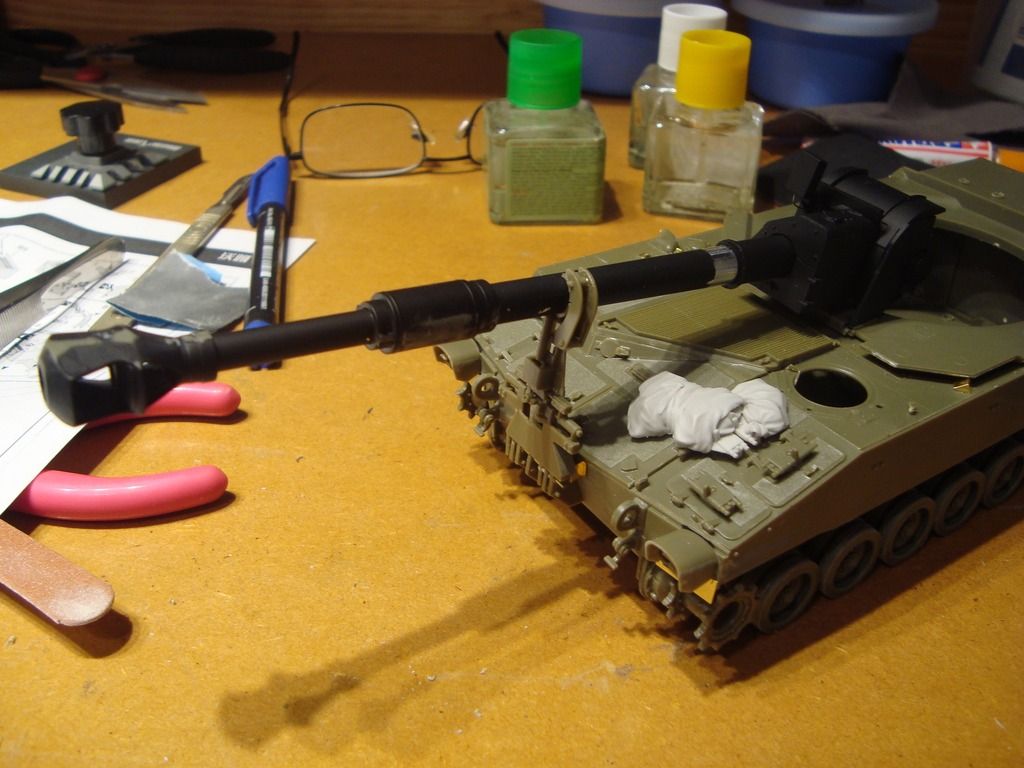
I've given the main gun a coat of Chaos Black primer from Citadel as suggested by Philipp. I'm pretty happy with the primer, it gives a nice fine even coat that sticks well. I've filled and sanded the seams in the muzzle brake and the fume extractor. Wiring has been added to the guns radar but is not visible in the pic.
I've made up one of the two stowage baskets. They are a complete fiddle and the only place the Voyager PE has let me down. It is complete overkill to use it as most is hidden by the stowage, and the AFV kit parts are fine enough. The Voyager mesh was finer than the kit suppled PE, but didn't fit well and I had to trim it down.
Anyways, back to work proper as of Wed next week, not really a break this one as I worked on and off throughout. Should get a chunk of the turret done this week. Hopefully my order from BNA turns up soon as it has the crew in it...and a sheep
The first bit of stowage is secured. I had to rebuild the articulations of the travel lock as they were pretty basic. The lockers on the rear hull are from the Voyager set. I won't be doing the same on the turret as the AFV ones are detailed enough. The wee locks either side of the rear door are fully workable as are the spades which I will eventually stow as the vehicle won't be in action in the diorama I have planned. It appears from the research I've done they only deploy the spades when firing max charge anyway.
The mud guards were a fiddle, but again are fully articulated, though I've glued them in the down position. The wee spring is made from fuse wire. I'm getting better with PE and am definitely less scared of it now
This is the start of the turret, the whole vehicle looks bare without a ton of stowage, I've just placed the main stowage piece from Legend to get a feel for it. This is about half of what I have planned.
Final pic is the base of the turret with the cannon installed and in the travel lock. This is how I plan to have it positioned.
I've given the main gun a coat of Chaos Black primer from Citadel as suggested by Philipp. I'm pretty happy with the primer, it gives a nice fine even coat that sticks well. I've filled and sanded the seams in the muzzle brake and the fume extractor. Wiring has been added to the guns radar but is not visible in the pic.
I've made up one of the two stowage baskets. They are a complete fiddle and the only place the Voyager PE has let me down. It is complete overkill to use it as most is hidden by the stowage, and the AFV kit parts are fine enough. The Voyager mesh was finer than the kit suppled PE, but didn't fit well and I had to trim it down.
Anyways, back to work proper as of Wed next week, not really a break this one as I worked on and off throughout. Should get a chunk of the turret done this week. Hopefully my order from BNA turns up soon as it has the crew in it...and a sheep
I'm a serial kit starter....
Completed Campaigns:
Completed Campaigns:
-
Chris Smith
- Senior Site Contributor.....
- Posts: 666
- Joined: 22 Jul 2014, 20:59
Re: M109A6 Paladin
Nice start Adam. It's going to be a busy looking model with all that stowage.
Chris
Chris
Completed Campaigns: