Page 5 of 6
Re: Sd.Kfz. 251/21 Drilling
Posted: 04 Sep 2015, 12:05
by Raoul Kunz
Just "Pretty happy" ? It's AWESOME!

Best regards
Raoul G. Kunz
Re: Sd.Kfz. 251/21 Drilling
Posted: 07 Sep 2015, 16:55
by Shawn Ramsey
Raoul Kunz wrote:Just "Pretty happy" ? It's AWESOME!
Best regards
Raoul G. Kunz
Chris Smith wrote:Swanky painting, guess you're happy with the new airbrush then?

Chris
Raoul am really happy with it. Chris- I really like my new air brush. Cheers- Vincent.
Moving forward and almost done.
Detail painting finished, chipping and washes done.
Shawn
Re: Sd.Kfz. 251/21 Drilling
Posted: 07 Sep 2015, 17:10
by Philipp Gross
Looks absolutely fantastic!
Almost makes me sad that mine will be olive drab

Philipp
Re: Sd.Kfz. 251/21 Drilling
Posted: 07 Sep 2015, 20:41
by Rob Matthews
Shawn - that's wonderful. Cracking paint job. Give us some clues?
The Chipping speaks for itself

Outstanding Red One
Rob
Re: Sd.Kfz. 251/21 Drilling
Posted: 08 Sep 2015, 09:54
by Raoul Kunz
Your chipping is awesome!
...okay the whole paint job is awesome but the chipping stands out

.
How did you do it?
Best regards
Raoul G. Kunz
Re: Sd.Kfz. 251/21 Drilling
Posted: 08 Sep 2015, 21:39
by Shawn Ramsey
Philipp- Northing wrong with Olive Drab at all. My next build may even be that color.
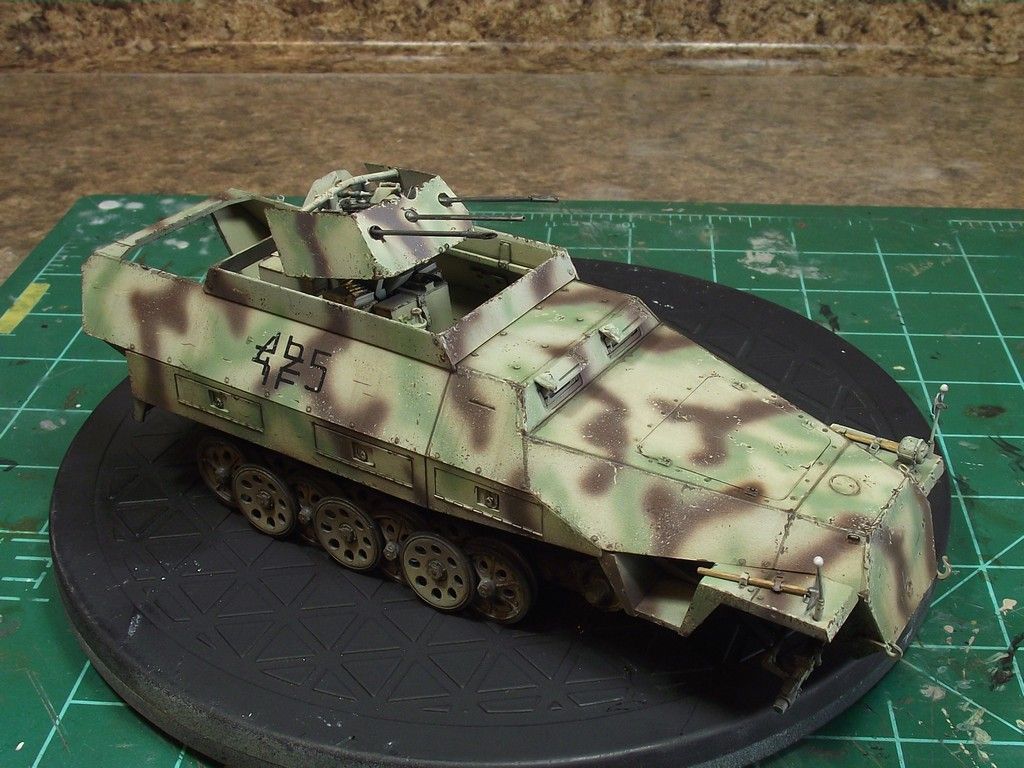
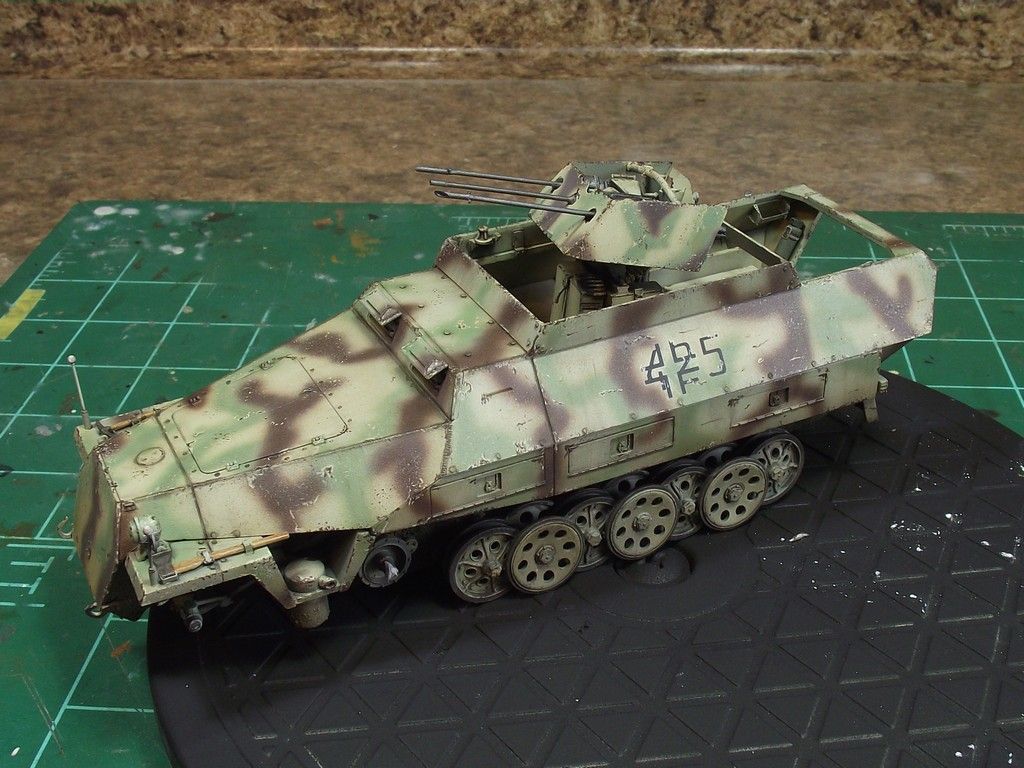
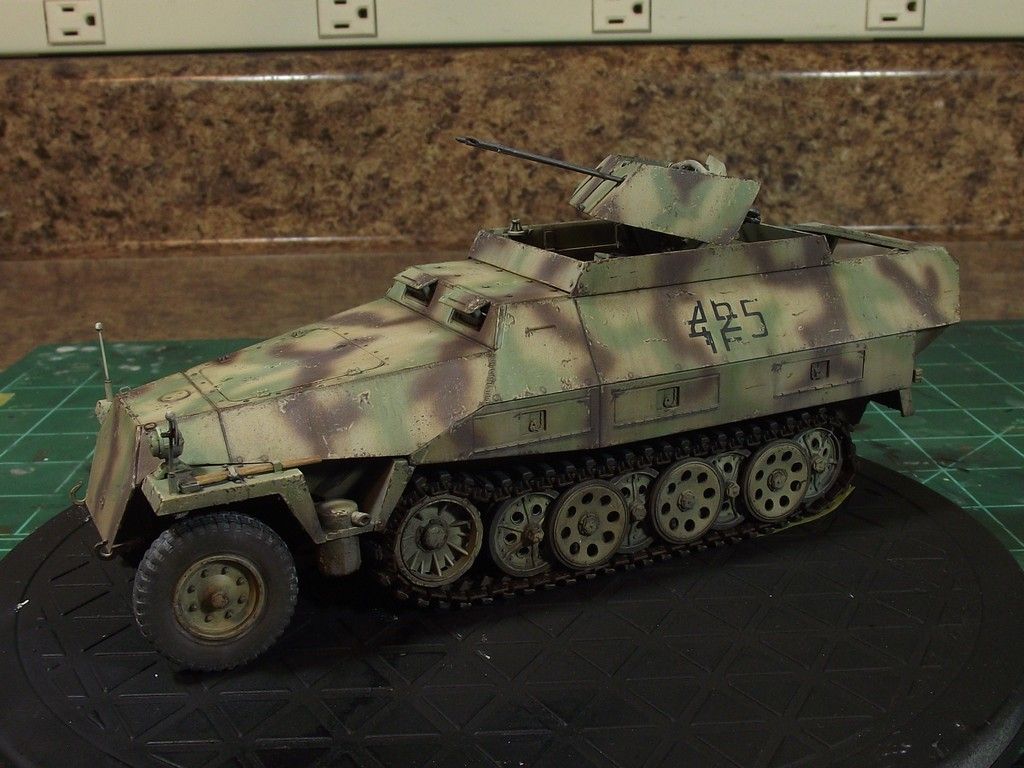
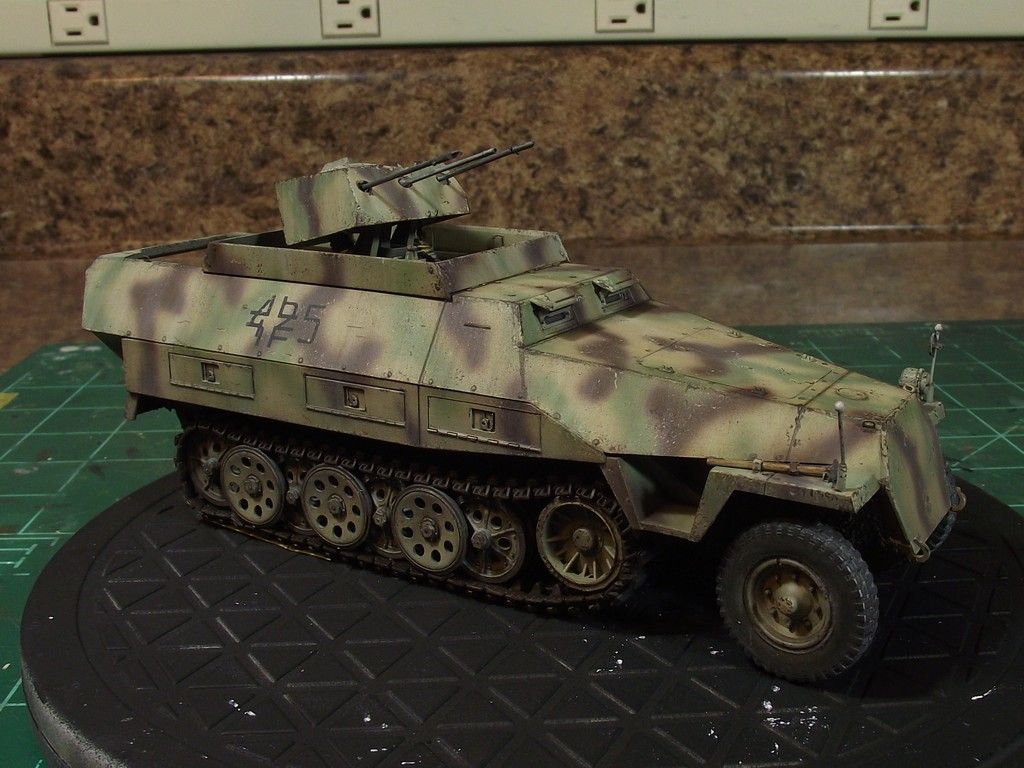
Rob and Raoul- As far as the painting all I can say is I love my new airbrush. Also got ahold of Vallejo new Airbrush Thinner (might not be new but the only Vallejo thinner I had was a white looking color and I did not like it at all) This Airbrush thinner is clear. It seems to have solved my problem with my satin coat on the interior. The washes kept eating my paint. I was diluting the Satin Varnish with water before. Now I'm using the airbrush thinner and did not have a problem on the exterior.
So far the washes you see in the pic was done with the Vallejo washes. Its applied let it dry for a few minutes then remove excess with water and or a little of the airbrush thinner I mentioned above. The streaks you see in the pics were done the same way with the Vallejo wash.
Chipping is really easy just don't over do it. It's like scribing figures to me a necessary evil IMHO to make things look good. All I did was used the base yellow and applied chips over the green and brown. Then I used Ammo chipping color and applied that inside the yellow chips(not all of them but most). I then used the chipping color over the yellow base as well. I used both the paint brush and sponge tech. I spent about 2 hrs chipping this.
I have made more progress but the pics I took do not do it justice. More pics soon I hope.
Thanks for looking
Shawn
Re: Sd.Kfz. 251/21 Drilling
Posted: 09 Sep 2015, 04:37
by Shawn Ramsey
Well I am just about done with this GB project. I still have to attach the rear doors, antenna and the tracks need to be permanently attached.
Every tracked vehicle I build is cursed

. The damn tracks are either to loose or to tight.

They are to loose right now but if I remove one link then they will be to tight. Oh well.

Hopefully a base and a couple of figures down the road. We will see. But I want the 251 to be done by Friday.
In the following pics I applied the oil dot technique, streaking effects and finally some dust to the lower part of the haul around the stowage boxes. This is hard to see in the pic.
Re: Sd.Kfz. 251/21 Drilling
Posted: 09 Sep 2015, 07:46
by Steve Hutchinson
Cracking finish, Shawn
for a "simple" chipping technique it really is very effective
Another great build, and with a base to come this will keep delivering even after the GB has finished
I must check on my thinner, hopefully it wont have gone cloudy

Very nice work Shawn
Steve H
Re: Sd.Kfz. 251/21 Drilling
Posted: 09 Sep 2015, 09:39
by Chris Smith
What Steve said, really great job Shawn
Chris
Re: Sd.Kfz. 251/21 Drilling
Posted: 09 Sep 2015, 23:46
by Vincent Power
That's a wonderful finish you've done there Shawn. Very nice indeed.

Vincent


